The Gin Creek blog
Kitchen Remodeling Ceiling Ideas: The Ultimate Homeowner's Guide
When homeowners plan a kitchen remodel, the conversation almost always starts with cabinets, countertops, and flooring — and stops one surface short. Look up. The ceiling is the fifth wall of your kitchen, and it covers more uninterrupted square footage than any other surface in the room. Left as plain flat drywall, it quietly wastes the biggest design opportunity overhead. Treated with intention, it adds height, warmth, and character that no cabinet finish can match.
The good news is that kitchen ceiling ideas scale to almost any budget and any stage of a remodel. Some treatments, like paint and plank cladding, are weekend-friendly. Others, like beams and coffers, belong in the construction phase. This guide walks through the options the way we walk through them with homeowners: what each idea looks like, what it demands of your room, and how to choose the one your kitchen will love for decades.
Gin Creek Kitchen's Starting Point: Treat the Ceiling as the Fifth Wall
Every ceiling decision begins with two honest questions: how tall is the room, and how much light does it get? Standard eight-foot ceilings want treatments that draw the eye up without adding visual weight — light colors, narrow planks, shallow details. Taller ceilings can carry deeper texture, darker stains, and dropped elements that make a big room feel gathered rather than cavernous. Match the ambition of the treatment to the proportions of the room and every idea below becomes easier to choose.
Gin Creek Kitchen Favorite: Beadboard and Planked Ceilings
Few treatments deliver as much farmhouse warmth for as little fuss as a beadboard or tongue-and-groove plank ceiling. Run the planks in the direction you want the room to feel longer, paint them a soft white or cream to bounce light around, and the whole kitchen lifts. Planking also forgives an aging drywall ceiling beautifully — it covers hairline cracks and uneven texture without a skim coat.
For a slightly dressier variation, frame the planked field with a simple flat trim border where the ceiling meets the wall. It reads as casual crown molding and gives painted planks a finished edge. In kitchens with low ceilings, keep the planks narrow and the border slim so the treatment adds character without lowering the room.
Gin Creek Kitchen Favorite: Exposed and Boxed Beams
Wood beams are the ceiling idea homeowners ask about most, and for good reason: nothing else adds architectural age to a newer kitchen so quickly. Genuine reclaimed timbers are gorgeous but heavy, and they demand proper structural support. Boxed beams — hollow builds made from three boards joined into a beam shape — deliver the same silhouette at a fraction of the weight, and they can hide wiring, duct runs, or an unsightly soffit along the way.
Spacing matters more than size. As a rule, beams look most natural running across the shortest dimension of the room, spaced evenly rather than crowded. A stained beam over a white planked ceiling is the classic farmhouse pairing; a beam matched to pale cabinetry feels quieter and more modern farmhouse. Either way, echo the beam tone somewhere below — open shelving, a vent hood surround, or a wood island top — so the ceiling talks to the rest of the kitchen.
Gin Creek Kitchen Favorite: Coffered and Tray Ceilings
If your kitchen has the height to spare, coffered ceilings bring rhythm and shadow that flat drywall never will. A grid of shallow beams divides the ceiling into recessed panels, and even a modest coffer adds a sense of craftsmanship that suits traditional and transitional kitchens. Keep the coffers shallow and painted to match the trim for a look that feels built-in rather than bolted on.
A tray ceiling is the gentler cousin: a single recessed section, usually over the island or across the whole room, that lifts the center of the ceiling a few inches. That recess is a natural home for accent paint, planking, or concealed cove lighting that washes the ceiling with a soft evening glow. Both treatments work best when they align with the cabinetry layout below, so plan them early in the design phase rather than as a finishing thought.
Gin Creek Kitchen Favorite: Pressed Tin and Statement Texture
For homeowners who want a ceiling guests actually comment on, pressed tin tiles are the farmhouse original. Their stamped patterns catch light in a way paint cannot, and they wear age gracefully — a soft patina only improves them. Tin shines brightest as a defined zone rather than wall-to-wall coverage: over the island, above the range, or inside a tray recess, where it reads as jewelry for the room.
Other textures earn the same treatment. Shiplap laid on the diagonal, subtly patterned ceiling wallpaper, or a skim of textured plaster each give the fifth wall a quiet handmade quality. The discipline is restraint: pick one statement texture per kitchen and let it hold the room's attention alone.
Gin Creek Kitchen Notes on Ceiling Color
White is the default for a reason — it reflects light, lifts low rooms, and lets cabinetry and counters lead. But color overhead is one of the most underused moves in kitchen remodeling. A soft sage, muted blue, or warm putty on a planked or tray ceiling adds depth without darkening the workspace, especially in kitchens with generous natural light. The reliable formula is walls light, ceiling a shade deeper, with trim in crisp white to frame the transition.
Whatever color you choose, mind the finish. A flat or matte ceiling paint hides imperfections; anything glossier will spotlight every seam. In a working kitchen, choose a scrubbable formulation — steam and splatter rise, and the ceiling above the range works harder than any other.
Gin Creek Kitchen Lighting Guide: Pendants, Height, and Placement
A remodeled ceiling is only finished once the lighting honors it. Pendant lights are the farmhouse kitchen's signature: hung over an island or sink, they pull the eye upward and show off whatever treatment you chose overhead. As a starting point, hang pendants so the bottom of the shade sits 30 to 36 inches above the countertop, and space multiples so their pools of light overlap gently rather than spotting.
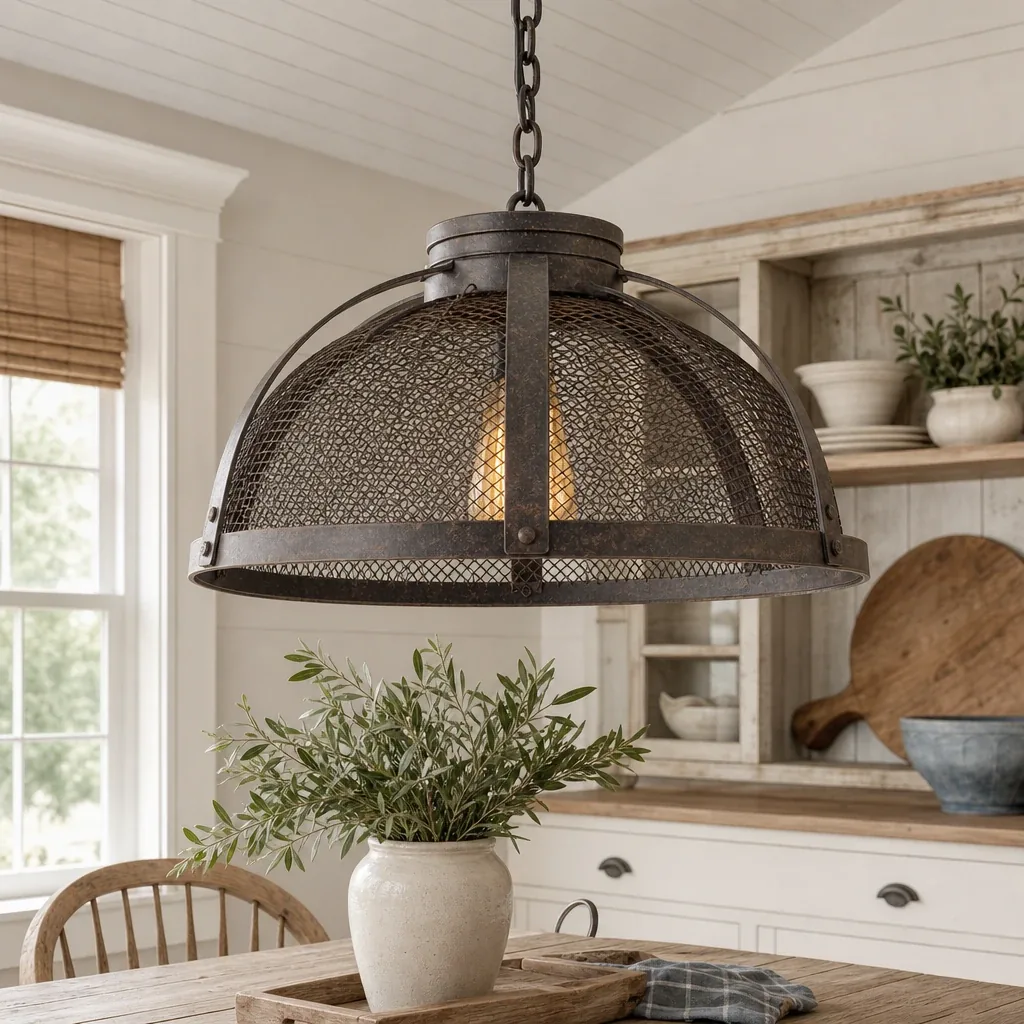
Layer the rest of the plan around them. Recessed lights handle the working light, placed to avoid shadows on counters; a statement fixture over the table adds personality; and under-cabinet lighting keeps the workspace bright after dark. A dark metal pendant against a white planked ceiling — the kind of contrast in the photo above — shows how fixture and ceiling finish each other.
Gin Creek Kitchen's Final Checklist Before You Commit
Before any ceiling work begins, confirm the practicalities. Have a contractor check ceiling joists and structure before committing to heavy materials like reclaimed timber. Map recessed lights, vents, and speakers before planks or tiles go up, so cutouts land cleanly. Order a little extra material — ten percent overage is the standard cushion — and if you are painting, finish the ceiling before the walls so drips never touch finished work.
Most of all, choose the ceiling that fits the kitchen you actually have. A modest room with a beautifully planked white ceiling will out-charm a grand room with an overworked one every time. Start with the bones, add one statement, and let the fifth wall quietly finish the heart of your home — that is the approach we return to at Gin Creek Kitchen, and it has never steered a remodel wrong.